⚱ Examinable Setup
After all that we can move to finally creating the examinable
Now you add Examinable script in examine object.
After adding the Examinable in object you will see this.
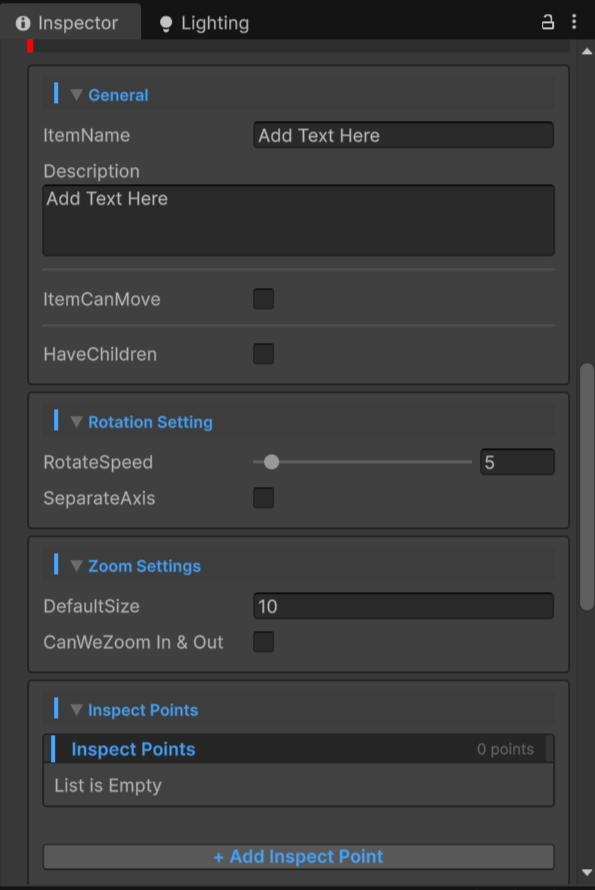
It may look like there are lots of options but it is fairly easy to setup.
Setup
General
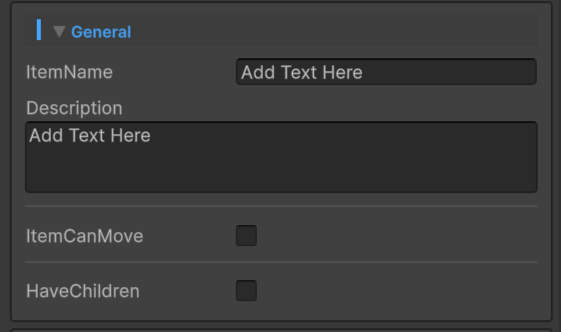
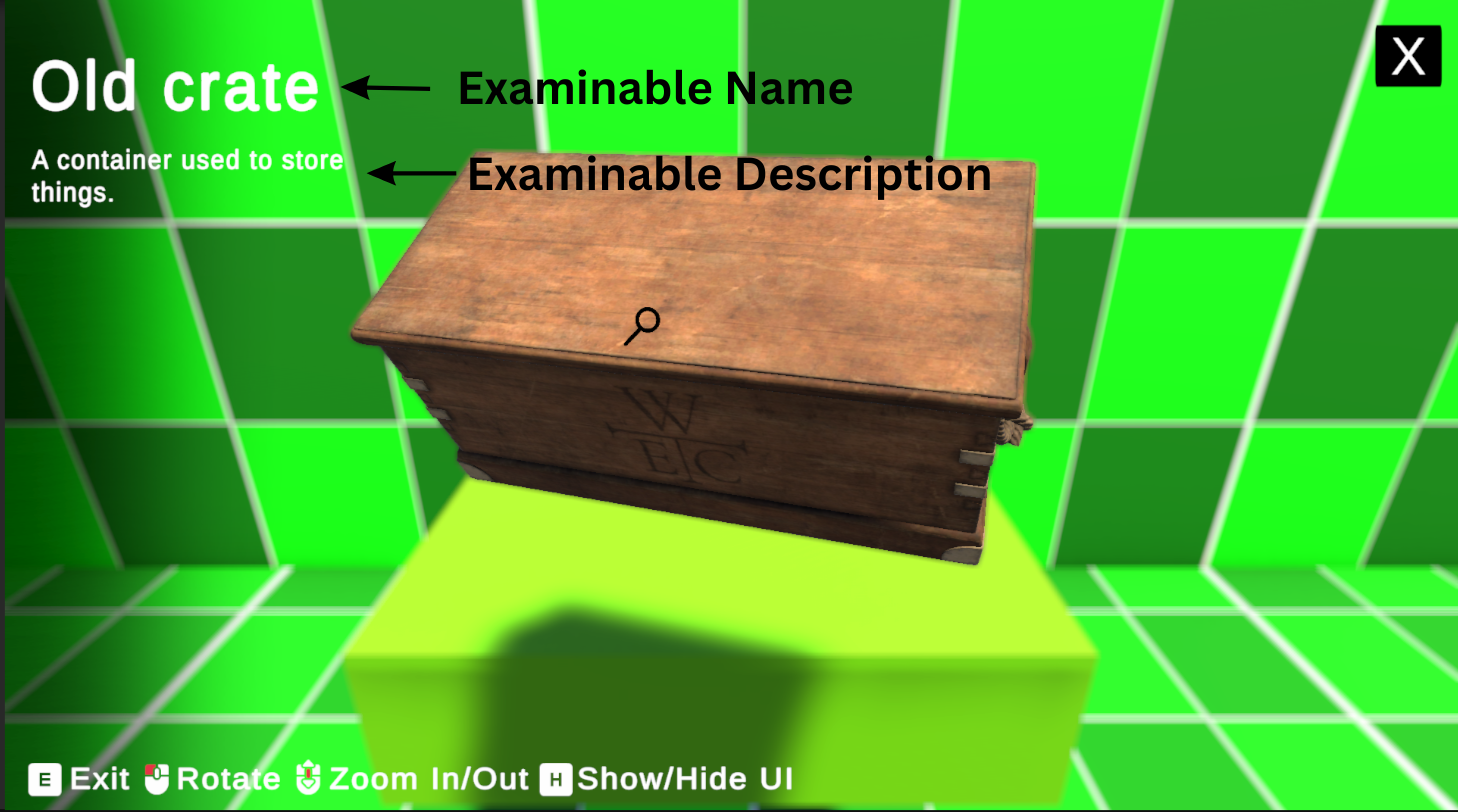
- ItemName → Here you can add here your examinable object name, it will be displayed on UI.
- Description → add your description about your examinable object here, it will be displayed on UI.
UI explained → UI Setup.
- ItemCanMove → Enable it, if your examinable can be moved in run-time, it will capture its new moved position and use it later to place that examinable on its new position when exit examine state.
Note - it only captures examinable position while we are not in examine state.
- HaveChildren → Enable it, if you have children under your examinable object, after enabling you will see this.
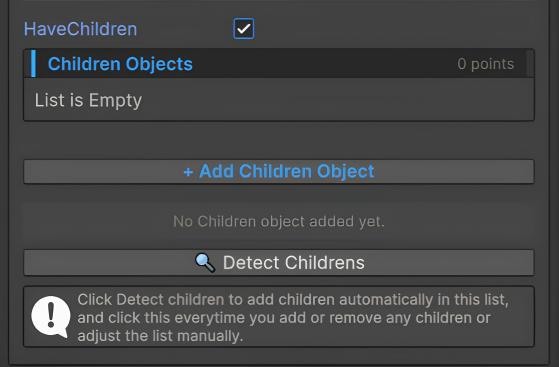
And if you're feeling lazy today and don't wanna add children's manually just click on Detect children's it will add them automatically.
Rotation Settings
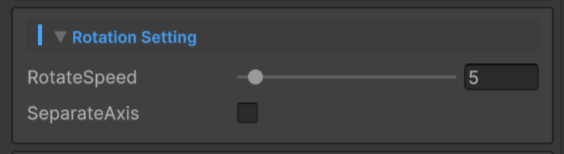
- RotateSpeed → This float controls at what speed your examinable object will rotate.
- SeparateAxis → Enable it, if you want different speed for X & Y axis. after enabling it you will see this.
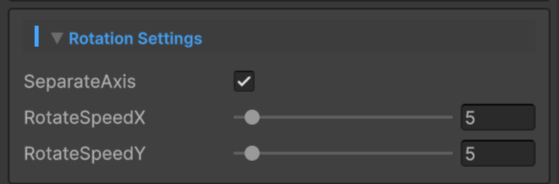
Here you can edit your X & Y speed individual.
Zoom Settings
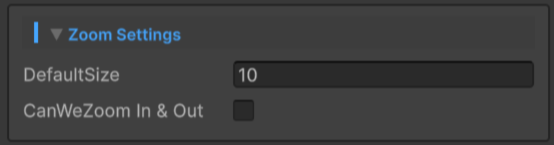
- DefaultSize → Here you can add your default size that you want every time you start your examine state.
- CanWeZoom In & Out → Enable it, if you want to zoom In & Out in your examinable object. After enabling you will see this.
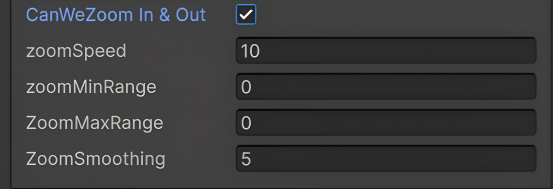
- ZoomSpeed → here you can control your zoom in & out speed.
- ZoomMinRange → here you can set your minimum zoom range of your examinable object.
- ZoomMaxRange → here you can set your maximum zoom range of your examinable object.
- ZoomSmoothing → here you can set smoothing inbetween of your zoom. [Recommended value [5]]
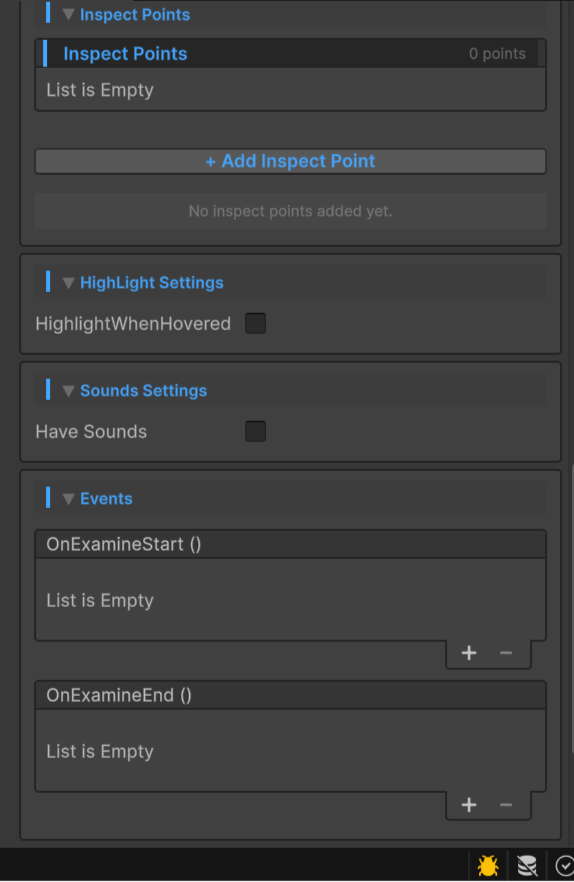
Inspect Points
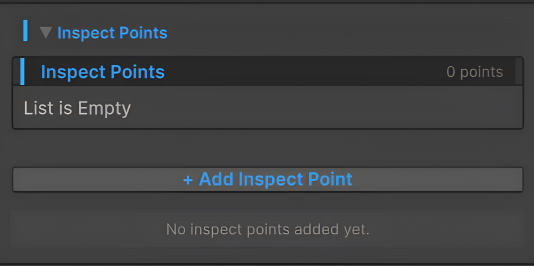
Here you can add your Inspect Points if you have them in your examinable object.
HighLight Settings

- HighlightWhenHovered → Enable it, if you want to show a emission highlight when player hovers over the examinable object. After enabling this will show.
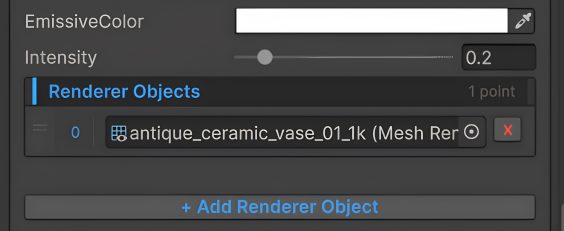
- EmissiveColor → you can control your emissive color from here.
- Intensity → here you can control the intensity of your emissive color.
After that you will see a empty list of Renderer Objects.
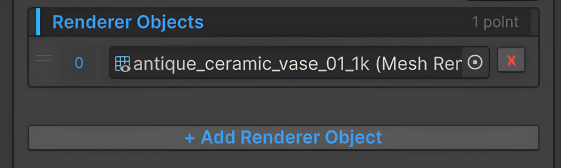
Here you can add your objects on which you want to show highlight.
Sounds Settings

- Have Sounds → Enable it, if you want sounds in this examinable object. After enabling you will see this.
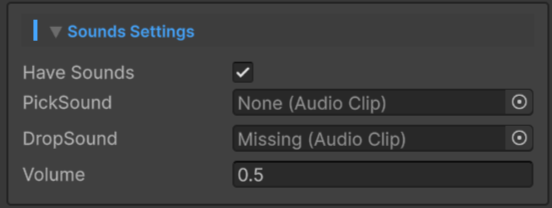
- Pick Sound → here you can add your AudioClip sound of picking, this sound will play when you will enter in examine state.
- Drop Sound → here you can add your AudioClip sound of dropping, this sound will play when you will exit in examine state.
- Volume → here you can adjust your volume of sound.
If you don't have sound for dropping you can leave the Drop Sound field empty and same for picking.
Ensure that HaveSounds is enabled in ExamineManager, All details about Sounds Setup in ExamineManager, Find title named Sounds.
Events

Here you can add your Customs Events .
- OnExamineStart → Plays on entering in examine state.
- OnExamineEnd → Plays on exiting of examine state.
Please make sure there is a Collider in the examinable object and that collider is not interfering with other colliders to make sure proper interaction. [Recommended adding a MeshCollider]